How to Install the SecureGlobalPay Plugin on Your WooCommerce Site
Welcome to our community of merchants by installing the WooCommerce Plugin! We’re excited to have you on board as you download our advanced WooCommerce plugin for SecureGlobalPay’s payment gateway services. This plugin is crafted to enhance your operations, improve your user experience, and set the stage for remarkable growth and success. We’re here to support you every step of the way, starting with the step-by-step guide below, as you discover the vast potential our technology brings. Installing the WooCommerce Plugin made easy! Welcome aboard, and prepare to embark on a journey with SecureGlobalPay and WooCommerce’s efficiency and innovation for your business.
Step 1: Go to our Product page and fill out the form to download the SecureGlobalPay WooCommerce plugin.

Step 2: After completing the form, click on “Download.”

Step 3: Log in to your store’s WordPress backend, navigate to Plugins, and click “Add New.”

Step 4: Click “Upload Plugin.”

Step 5: Select the extension zip file that you downloaded earlier and click “Install Now.”

Step 6: Activate the Plugin

Step 7: Click “WooCommerce Settings”.

Step 8: Click “Payment Tab”.

Step 9: Enable the Credit Card, eCheck option, or both.

Step 10: Click on the “Manage” button

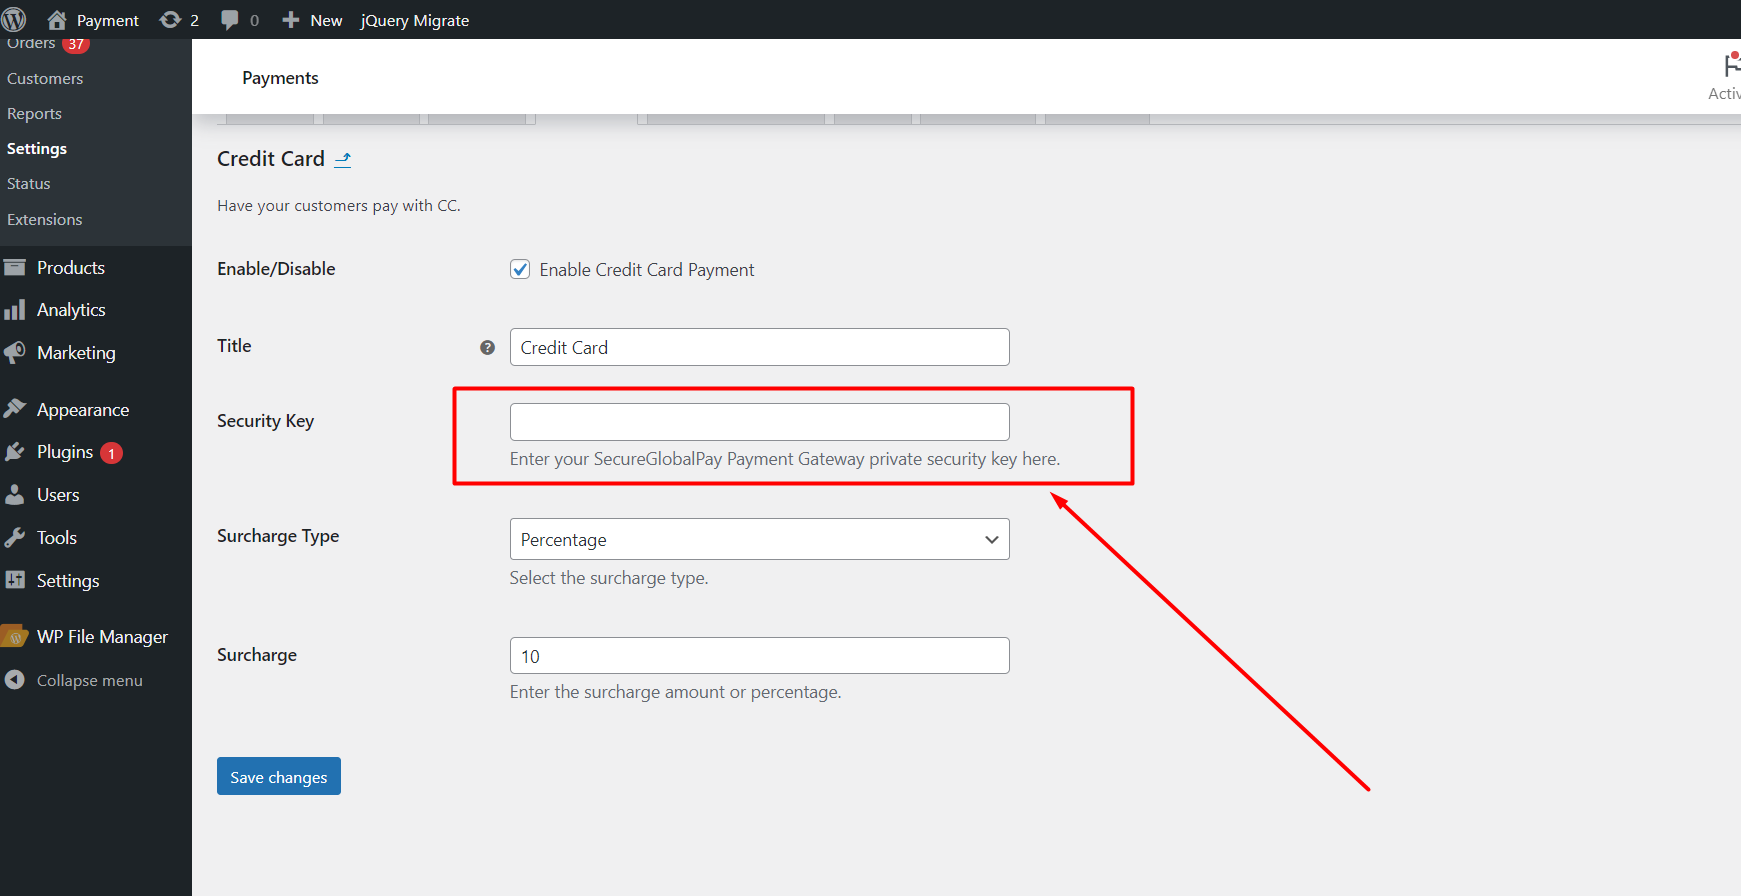
Step 11: Enter your Merchant API Key and save the changes.

Step 12: Visit your store’s checkout page to view the selected option, whether it’s Credit Card or eCheck.

If you experience any issues during the installation process, our dedicated support team is here to help. You can reach out to us at integrations@secureglobalpay.net for assistance.


